Lexus IS Forum banner
61 - 80 of 153 Posts
Discussion starter · #62 ·
Mounted my E85 Flex fuel sensor and prepared my fuel line. The OEM bracket for the rear brake lines looked like a nice spot to mount the flex fuel sensor. The mount I chose is a Gnarly LSX unit, available on ebay for about $15. I drilled a new 6mm hole for a flathead cap screw, and made an aluminum spacer to fit between the bottom of the sensor mount and the top of the brake line bracket:

Image


The disconnected rubber line is the fuel return back to the tank. I'll be plumbing the flex fuel sensor into the return line. As you can see, the sensor is perfectly in-line when mounted here; and the connector on the sensor is facing conveniently forward to jive with the engine harness:

Image


Measured for, and made the fuel supply line to the fuel rail. This is Parker 900 series 6AN hose, which is SAE J30R7 rated - which means it's compatible with E85. Those are push-lok fittings, but I couldn't help myself and installed some Oetiker single-ear clamps to ensure no leaks. I put some abrasion-resistant braid over the hose, and then secured it in place with some Raychem SCL heat shrink "ferrules" on each end:

Image


Toyota uses a steel hard-line with banjo fitting for the fuel line. Because I'll be using AN fittings, I needed to adapt from the 5/16 (8mm) OEM fuel line to AN. I did this with a Swage-Lok compression fitting, welded to a SwageLok 6AN male gland. These fittings are commonly used for laboratory/instrumentation purposes. They have a compression ferrule that crimps down onto steel/stainless tubing and creates a seal that's good for 25,000 psi. Used these a lot in the past and they're outstandingly reliable.

 
Discussion starter · #63 · (Edited)
Had kinda been avoiding looking into my fuel pump arrangement; I guess I'd been hoping there was some kind of kick-ass super pump already in there. But hoping isn't good enough - so I dug into that to find an old Walbro 255 high pressure - which is not adequate to meet my target of a comfortable 525-550whp on E85.

So I've been working on upfitting my fuel system. Almost done now installing a Walbro 450 high pressure into the original hanger assembly. I've been updating another thread with the particulars of that here:


I thought it was a bit beyond the scope of this thread and might be relevant to others in the future. Thought it would be better in its own thread, rather than buried in here.
 
Discussion starter · #64 ·
Got all my hot parts coated. Used Cerakote oven cure V-series "satin silver" (V-119).

This was my first time using this product and was surprised how easy it is to apply. I switched my blast cabinet over from glass-bead to 100grit Garnet sand, blasted everything, blew it off with compressed air, gave it a wipey with a lint-free cloth and acetone - and sprayed it on. The stuff smells really, really, really weird - and the viscosity of it in the bottle made me think it would be super easy to make the product run - but it's almost as if the stuff dries out and gets gooey while in the air. It sticks to the part like glue and I'm not sure you could make it run if you wanted to. You wait at least 30 minutes to allow the solvents to flash off, and then into the oven for a an hour @ 500ºF. The parts are not "wet", so smudging the coating is a minimal concern.

This product is supposed to handle 1800ºF. They have another product that's also supposed to handle 1800º that doesn't require the oven-cure... But I have a suitable oven and it just seemed to me like the oven-cure product must be "better". Here in an impressive little demonstration video of their non-oven cure C-series product:


Anyway, here are the parts ready to go back on the car. I'm hoping they'll darken up a little and maybe become a bit more dull after they are exposed to real exhaust heat. They kinda look like they've been sprayed with "mexi-chrome" spray paint to me... But I'm definitely too lazy to order another color and bother re-coating.

Image


I thought the turbine housing came out looking really nice:
Image


You might notice what appears to be a weld on the manifold... That's because there is one. I have another thread with the details of that:

Fingers crossed!
 
Discussion starter · #65 · (Edited)
I came across a compressor map from the early 2000's that is allegedly for the Master Power T70 turbo that I've got. If correct, it should be pretty comfortable making 550whp on the 2J. I don't know who put the red datapoints on the map, but I can say this turbo made 470whp @ 17psi with E40 fuel and 16º timing on my car before I took everything apart.

Image
 
I think I'd prefer a little darker, but it doesn't look bad at all. I saw someone with a polished/engraved 1jz and it had a similar color on it's hot parts and looked really nice. I think the Cerakote will hold up, next time I have access to a spare oven I might do mine too.
 
Discussion starter · #67 · (Edited)
Now that it's done - I'm thinking I'd have preferred the tungsten or perhaps "turbine coat" color. Oh well; it's done.

I prolly shoulda contacted Cerakote to ask what the practical difference is between the oven-cure V series vs the C series that doesn't require the oven cure. I'd stick with oven-cure if they told me it's more durable or is otherwise "superior" - but if the C series works just as well, the oven-cure is just an extra step.

I came to know Cerakote from the firearms industry; it's very commonly used there. The gunsmiths I've spoken to have made it out to be a pain to work with, but that was just not the case from this experience. The most difficult part of the process was cleaning out my HVLP detail gun - which was much easier than cleaning it up after running actual paint thru it.

Speaking of cleaning paint out of spray guns, I gotta vent:

I have an inexpensive Chinesium harbor freight HVLP kit. One of my employees asked to use it. I told them they were welcome to - but it MUST come back every bit as clean as when they took it. (which is to say impeccably clean). When I bust it out for this Cerakote project, I discovered it was seized - completely jammed up with dried (red) paint. It took a several hour soak in acetone to even take it apart. Then another hour of picking, swabbing, sloshing and blowing to get it ready to use. To say I was extremely annoyed at the guy would be an understatement.

Pro tip: When you borrow somebody's stuff, give it back to them in as-good or better condition than you got it. Goes a long way in terms of them letting you borrow their stuff again in the future.
 
Discussion starter · #68 ·
Dang, it's been a while and I don't have all that much new to report except my Link G4x ECU and custom Panic harness are finished and supposed to be here very soon.

In the meantime, I bought a lower manifold from Dodo Racing that marries the GTE upper plenum to the GE cylinder head. This makes the throttle adaptor elbow I made unnecessary, as well as the clearancing I did to the brace on the underside of my hood. But, it fits the car better, looks better and allows me to use the other adaptor I bought that mounts the Bosch DBW throttle to the GTE plenum. Overall, a nice solution.

Before:
Image


After:
Image


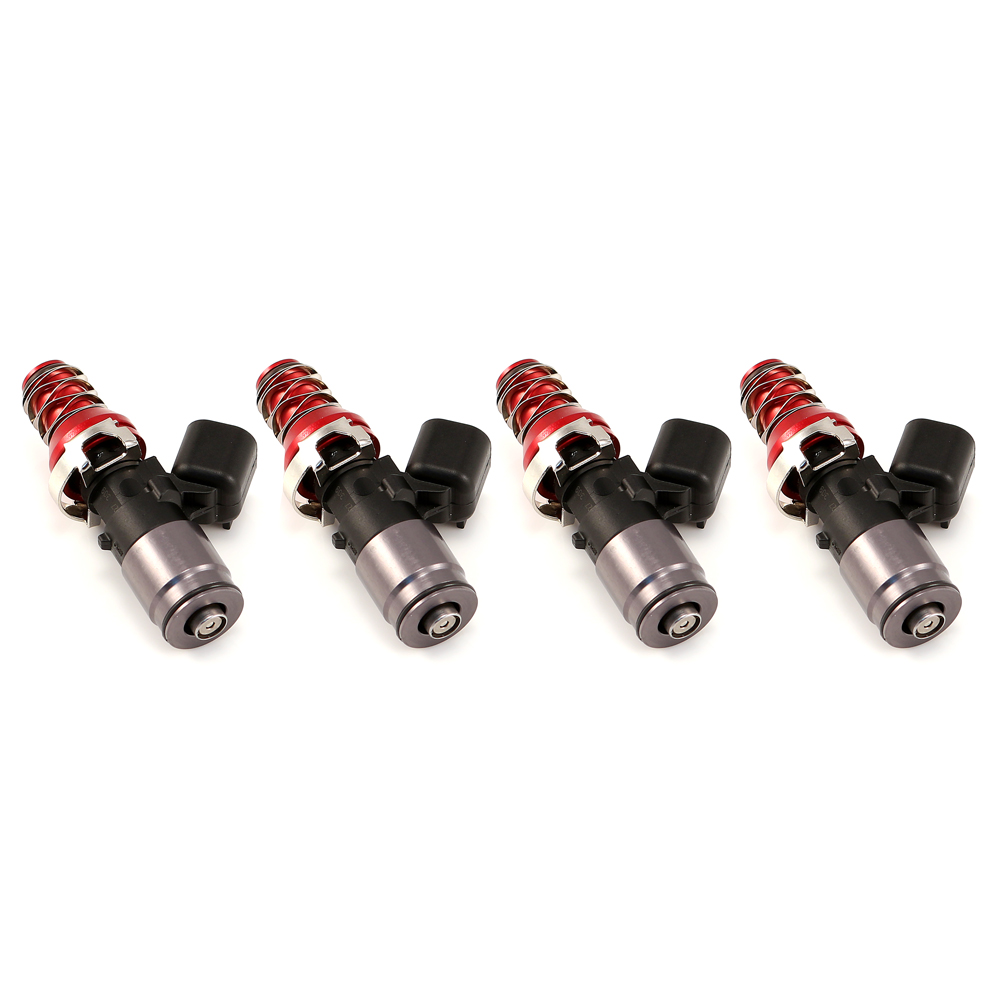
The injector bosses in the Dodo manifold are designed around old-school 16mm Denso style injectors. I think that was a mistake because anybody that's gonna buy the manifold is "building" something and likely not going to use old-school Denso injectors. After a bunch of research, I learned that Subaru used the old Denso style injectors for the turbo EJ engines. Thus, Injector Dynamics sells a suitable adaptor. Part number WRX-16B
Image


Luckily, these adaptors fit the Dodo manifold and the Radium fuel rail nicely; even the overall length of the injector + 16mm adaptor + top hat adaptor works just right with the fuel rail and OEM plastic Toyota fuel rail standoffs. Be super duper careful installing the WRX adaptors because the o-rings are tiny and are easily damaged.

Still a lot of finalization stuff to do - basically everything is half-done; awaiting the ECU
 
Discussion starter · #70 · (Edited)
I noticed you shaved the ridge off the top of the GTE upper.
I sure did. Couldn't see any use for it; and thought it'd look nicer without. My scheme is powdercoat the upper/lower manifolds in metallic silver...

I don't have the patience to polish stuff OR maintain polished stuff!
 
Discussion starter · #71 · (Edited)
Here are a couple pics of the ECU and harness arrangement:
Image

Image


It's rather customized; some of the atypical functionality:

  • IGN1A coils
  • solid state relay fuel pump control
  • in-cabin Gage Art CAN gage
  • dual rotary trimpots in-cabin for adjusting boost and traction control settings
  • front wheel speed from WSS (for calibrating traction control)
  • Link CAN Lambda
  • purge valve control (to burn off vapors from charcoal canister)
  • Bosch Motorsport electronic DBW throttle
  • C6 Corvette accel pedal and position sensor
  • dual Bosch wideband knock sensors
  • fuel pressure
  • oil pressure and temp
  • flex fuel
  • functional OEM cruise control switchgear
  • momentary switch in-cabin for rolling anti-lag
  • pigtails for spare inputs/outputs so I can add features in future such as turbo speed, water/meth, exhaust pressure, etc

I have a lot of work to do finishing my end of the wiring for the car, then testing/mapping/configuring all the I/O - but the ECU/harness represents a big milestone in my project.
 
Discussion starter · #72 ·
Did a test-fit of the ECU and harness:
Image

Image

Image


Everything fits. I think it's so cool how the Panic Link setup integrates with the car so nicely.

Found a good home for my CAN Lambda and its associated fuse/relay. Modified the OEM double-relay block mounting to get it tucked in a bit better. These are both mounted via pre-existing tapped holes in the body of the car - which I prefer to do when possible:
Image


Went thru my old Haltech calibration to snag anything of use from it. There wasn't much. It's difficult to describe how crappy that thing was - but the ignition map was basically the only thing even sorta worthwhile. After all, it did run the car for at least 10 years without breaking the engine.... Maybe this will give you an idea:
Image


Next up is to finalize my fuel pump control wiring. Previously I arranged it based around a simple heavy duty on/off relay - but later decided to implement a solid state relay for PWM control of the Hellcat fuel pump.
 
That’s really nice how it all integrates into the car. You gonna be able to install the engine harness with the engine still into the car? Never really thought about it, may not be difficult.

God that old Haltech software looks like it was for windows 95. Like I’m playing an Atari emulator in 1996 on my Pentium 133 😆 It must be doing something good though, it’s ran your car all these years.
 
Dang, it's been a while and I don't have all that much new to report except my Link G4x ECU and custom Panic harness are finished and supposed to be here very soon.

In the meantime, I bought a lower manifold from Dodo Racing that marries the GTE upper plenum to the GE cylinder head. This makes the throttle adaptor elbow I made unnecessary, as well as the clearancing I did to the brace on the underside of my hood. But, it fits the car better, looks better and allows me to use the other adaptor I bought that mounts the Bosch DBW throttle to the GTE plenum. Overall, a nice solution.

Before:
Image


After:
Image


The injector bosses in the Dodo manifold are designed around old-school 16mm Denso style injectors. I think that was a mistake because anybody that's gonna buy the manifold is "building" something and likely not going to use old-school Denso injectors. After a bunch of research, I learned that Subaru used the old Denso style injectors for the turbo EJ engines. Thus, Injector Dynamics sells a suitable adaptor. Part number WRX-16B
Image


Luckily, these adaptors fit the Dodo manifold and the Radium fuel rail nicely; even the overall length of the injector + 16mm adaptor + top hat adaptor works just right with the fuel rail and OEM plastic Toyota fuel rail standoffs. Be super duper careful installing the WRX adaptors because the o-rings are tiny and are easily damaged.

Still a lot of finalization stuff to do - basically everything is half-done; awaiting the ECU
Proud to see these things going peoples builds!

Youre right, most people dislike the 16mm boss. But it was a decision I had to make. Being one of my first products, to me it was just a safer bet to keep it OEM spec.
You can easily adapt from 16mm to 14mm, but the other way around wouldnt be possible. This way I could make sure its compatible with all injectors out there.
Btw I will add 14mm injector bosses soon to my shop.

🍻
For the time being, DriftMotion sells an adapter.
 
Discussion starter · #76 ·
Discussion starter · #77 · (Edited)
You gonna be able to install the engine harness with the engine still into the car?

God that old Haltech software looks like it was for windows 95. Like I’m playing an Atari emulator in 1996 on my Pentium 133 😆 It must be doing something good though, it’s ran your car all these years.
No problem installing the harness with the longblock in the car. Probably no problem with the turbo/manifold installed. Probably need to remove at least the upper intake plenum to get at the ECT sensor and knock sensors.

And actually, the Haltech software doesn't even run on Windows - it runs from DOS! In fact I had to do some research to figure out a way to even get a DOS prompt (via emulator) on a modern computer; it's called HALDOS....and don't get me started on the lengths I went thru to get Haltech PC software that matched the dealer-only beta-level firmware that'd been flashed into the ECU.

I'm not sure what I'm going to do about the branch of the harness that goes into the cabin. There is one 2-pin DTM, two 3-pins and two 4-pins. These are for, respectively, SSR fuel pump relay, the two rotary trim pots, accel pedal position and my CAN gage. This branch is hard-wired to the main ECU connnectors. I might be able to fish these pigtails through the firewall - but it's not something I'd ever want to have to mess with again. I may cut the branch in the middle and add connectors somewhere near the clutch master cylinder. That way, once the cabin sub-harness is installed into the cabin - It'll never need to come back out.

That Haltech was operating on only 4 inputs: Crank position, MAP, ECT, IAT. TPS was hooked up but Haltech's software didn't process that signal correctly and made it unusable.

Notice on the Haltech fuel table screenshot I posted - it isn't a 3D map. It's a 2D table associated with 1000rpm. There is a table for 0rpm, 500rpm, 1000rpm and so on. Very awkward, but it lessened the load on the limited processing speed of the ECU. Back in the 1980s, ECUs had so little processing power you couldn't enter a simple raw value into a table - rather, you'd calculate the slope between two points - so the ECU wouldn't have to do it. Things have improved a lot!
 
Discussion starter · #79 ·
I gotcha. Be sure to tell Aaron I'm his #1 fan lol.

For 11mm aftermarket injectors: 1JZ/2JZ Injector Boss for 11MM Top Feed Injectors

For 14mm aftermarket injectors: 2JZ-GE/7M Injector Boss for 14MM Top Feed Injectors
The description says something about "silicone sealer"... If I'm understanding correctly, you are supposed to basically glue the Drift Motion adaptors into the injector bungs of the manifold - as opposed to the injector dynamics design that uses an o-ring to seal the adaptor to the manifold.
 
The description says something about "silicone sealer"... If I'm understanding correctly, you are supposed to basically glue the Drift Motion adaptors into the injector bungs of the manifold - as opposed to the injector dynamics design that uses an o-ring to seal the adaptor to the manifold.
I was unaware of an alternative design, so I bought the DM ones about 6 months ago when I got my new injectors from them anyway. But yes, they are a tight fit, but will require a sealant. I wouldn't recommend silicone in gasoline or ethanol use though. I imagine it's not possible for an O-ring to be present when adapting from 16mm to 14mm. When going from 16mm to 11mm, I would also expect it. They do have a third set of these that are similar to the Radium ones that have an O-ring to block off the air assist port.
 
61 - 80 of 153 Posts